Stop Fumbling! Master This 5-Second Trick to Swap Your Apple Watch Band
Are you like me? Do you have a collection of bands for your Apple Watch? A silicone one for the gym, a leather strap for the office, a nylon loop for the weekend... One of the best features of the Apple Watch is its ability to match your style as easily as changing your shirt.
But wait—"easily"?
Many people, on their first try, experience a moment of fumbling. The band gets stuck, it won't slide in, or worse, you worry you're about to break something.
The truth is, the correct way to change an Apple Watch band really does take only 5 seconds once you're used to it. You aren't missing strength; you're just missing one small trick.
Today, we're going to reveal the secret to this "5-second band swap."

Step 1: Get Ready (1 Second)
Before you start, get prepared.
Prep the New Band:
Have your new band ready to go.
Protect the Face:
Take off your Apple Watch and place it face down on a soft surface, like a microfiber cloth or a t-shirt. This will prevent the screen from getting scratched.
Step 2: Find the "Secret" Button (1 Second)
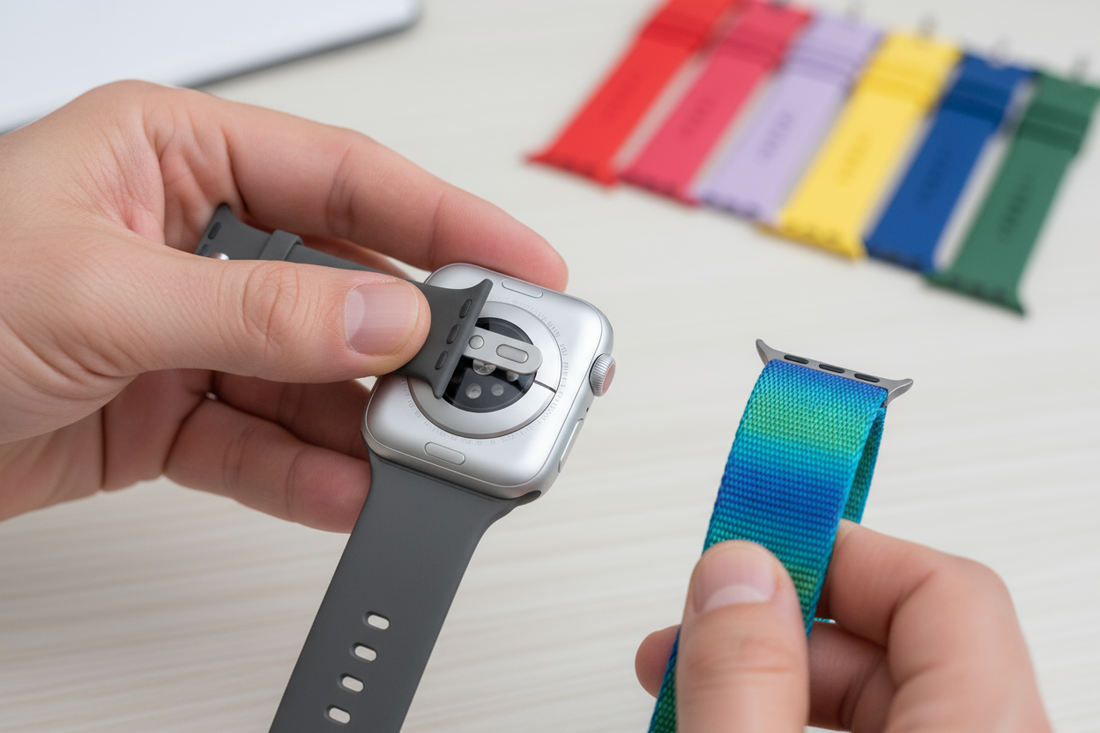
This is the most critical step. Turn your Apple Watch over to the back.
At the top and bottom, where the band connects to the watch case, you will see two small, oval-shaped buttons. They sit almost flush with the case. These are the band release buttons.
(This is a visual aid; a clear photo would be perfect here in a real blog post)
Step 3: Remove the Old Band (2 Seconds)
Now, for the core of the "5-second trick":
- Use your fingernail to press and hold one of the release buttons.
- While still holding the button down, slide the band horizontally out of the channel.
(This is a visual aid; a demonstration GIF would be most effective here)
Repeat this process for the other side of the band.
Where You Might Be Going Wrong!
90% of people fail the first time for one reason:
Wrong Action ❌: Trying to pull the band outward, pry it up, or twist it.
Correct Action ✅: "Press + Slide." The button simply retracts the locking pin. You just need to push the band smoothly along its track.
Step 4: Install the New Band (1 Second)
Installing the new band is even easier, and you don't even need to press the button.
Check the Orientation:
Look at your new band. The side with the metal pin or text (like sizing info on Apple's Sport Bands) should be facing your skin (i.e., facing down as you insert it).
Slide It In:
Align the band with the channel and slide it in firmly until you hear or feel a soft "click."
Confirm the Lock:
After it clicks, gently tug on the band (without pressing the button) to ensure it's securely locked in place and won't slide out.
Summary: What "5 Seconds" Really Means
Once you understand the "Press + Slide" motion, the entire process becomes incredibly smooth.
1 Sec: Place the watch
1 Sec: Press the top button
1 Sec: Slide the top band out
1 Sec: Slide the new band in (listen for the "click")
1 Sec: Repeat for the other side
It's that simple. You never have to worry about swapping bands being a hassle again. Now, go open your band collection and give your Apple Watch a new look to match your OOTD (Outfit of the Day)!